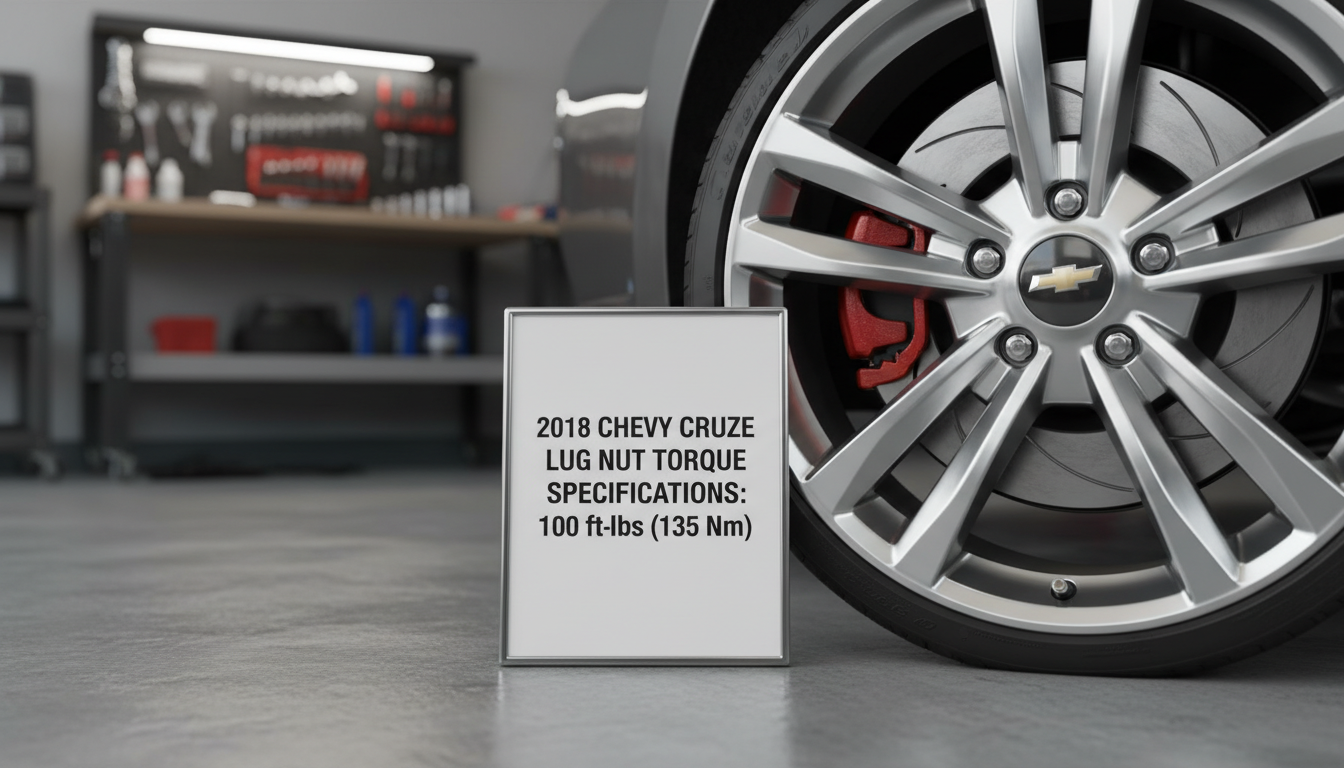
Proper Wheel Torque for Your 2018 Chevy Cruze: A Maintenance Guide
Getting lug nuts right keeps you safe. This short guide explains how to set the correct lug nut value of 100 ft-lbs for reliable wheel installation on this model. It shows how to use a torque wrench and the right wrench technique in clear steps.
Maintaining proper torque is a basic service that protects your vehicle during daily driving. Every model in the lineup calls for its own setting, so follow the numbers for your specific models and avoid common errors.
This page offers practical tips you can use in minutes. As a member of the maintenance membership, you unlock expert advice that simplifies each procedure and improves your experience.
Please review the disclaimer at the end of the article to understand limitations and confirm specs for your exact model before you begin.
Why Proper Wheel Torque Matters
A precise clamping force from properly tightened lugs is the foundation of safe driving. When a lug nut is tightened correctly, the stud stretches just enough to hold the wheel firmly against the hub.
Incorrect nut torque can let wheels vibrate loose or shift under load. That motion risks a roadside failure and can harm brake parts or the hub surface.
| Condition | Likely Result | Why it Happens |
|---|---|---|
| Under-torqued | Loose nuts, vibration | Insufficient clamping force |
| Correctly torqued | Stable fit, even load | Proper nut stretch and contact |
| Over-torqued | Warped brake rotors, cracked rims | Excessive force on studs and nuts |
Use a calibrated torque tool and follow the exact amount specified by the manufacturer. This ensures consistent clamping force across all lug nuts and protects your wheels and brake components from damage.
Finding Your 2018 Chevy Cruze Wheel Torque Specs
Locate factory torque values before any nut is tightened to avoid guesswork. This step saves time and prevents damage during a tire change.
Owner Manual Guidance
The owner’s manual is the primary service document that lists exact torque specifications for each model. Look in the maintenance or tire change section for the factory number you must use.
Door Jamb Verification
Check the driver’s door jamb sticker for quick confirmation. It often lists lug values beside tire pressure details so you can confirm both items on one page.
| Source | What It Shows | Why Use It |
|---|---|---|
| Owner’s manual | Exact torque specifications | Definitive factory guidance for your model |
| Door jamb sticker | Recommended torque and pressure | Fast on-vehicle check before service |
| Owner forums | Shared data for older models | Useful when manuals are unavailable, but verify |
Always cross-check any reported specs against the official manual. Different wheel models may need unique settings, and reliable torque specs keep your vehicle safe on the road.
Essential Preparation Before You Begin
A careful prep routine makes the final tightening more reliable and safer. Before any fastener is torqued, clear the mounting area and inspect each component. Clean contact surfaces so the wheel seats flat against the hub.
Cleaning Hardware and Studs
Remove dirt, rust, and debris from the lug nuts and studs. A clean seat gives a true torque reading and helps lug nuts clamp evenly.
Hand-start each lug nut to check threads and avoid cross-threading. If a nut resists by hand, stop and clean or replace it; forcing it can damage the lug and the nut itself.
Also check bolts and nuts for wear or damage. Taking the extra time to prepare studs and the wheel mounting surface prevents loosened wheels after installation.
| Prep Item | Why It Matters | Action |
|---|---|---|
| Mounting surface | Ensures even contact | Scrape and clean to bare metal |
| Lug nuts & bolts | Accurate clamp and safe fit | Inspect, clean, replace if damaged |
| Studs | Correct thread engagement | Brush and verify straightness |
The Correct Procedure for Tightening Lug Nuts
Tightening lug nuts correctly starts with a consistent pattern and steady increments. A clear routine reduces errors during service and helps the wheel seat evenly on the hub. Follow a stepwise approach and use a calibrated wrench for the final amounts.
The Star Pattern Method
Use a star (criss-cross) pattern to clamp the wheel. For five-lug wheels that means 1-3-5-2-4. This pattern pulls the wheel squarely to the hub and prevents gaps that cause vibration.
Hand-start each lug nut first to protect threads. Then move through the star pattern with the tool to keep seating even.
Torquing in Gradual Stages
Apply the final amount in 2–3 stages: about 50%, then 75%, then 100%. This staged method reduces stress on studs and gives the wrench a true reading.
| Stage | % of Final Amount | Why Use It |
|---|---|---|
| Stage 1 | 50% | Seats the wheel without overloading studs |
| Stage 2 | 75% | Equalizes contact across lugs |
| Final | 100% | Locks the correct nut torque for safe driving |
The Importance of Re-Torquing
Re-check every lug after 50 to 100 miles of driving. This simple step catches any settling and keeps nut torque consistent after the tire or service work.
Note: Membership members report this pattern takes less than five minutes and improves the overall experience. Always consult the disclaimer before performing any procedure.
Steel Versus Alloy Wheel Requirements
Not all rim types accept the same final clamping force; matching the setting to the material matters.
Steel and aluminum differ in stiffness and heat response. Steel rims are tougher but bend differently under load. Aluminum alloys may crack or deform if over-tightened.
Aftermarket wheels often use a different bolt type or seat design. Check the manual for thread pitch and exact specifications before service.
Magnesium or specialty alloys are especially sensitive. Always verify the recommended range from the wheel manufacturer for any passenger vehicle to avoid damage.
| Material | Seat Type | Why It Matters |
|---|---|---|
| Steel | Flat or conical | Higher ductility; fewer cracking issues, but requires correct nut type |
| Aluminum | Conical or spherical | Less forgiving to over-tightening; follow manufacturer specifications |
| Aftermarket/Magnesium | Varied | May need specific bolts and lower clamping ranges to protect threads |
Using the wrong lug nut or bolt can stop the wheel from centering and cause service problems later. Confirm seat type—conical, spherical, or flat—and match bolts to the seat and thread type before final tightening.
Common Mistakes That Compromise Vehicle Safety
Improper tools or lubricants can change how much clamp force the studs actually see.

Impact guns deliver inconsistent torque and should only be used for removal or initial snugging. Using an impact gun for final tightening can stretch studs, warp brake rotors, or damage your wheels.
Lubrication and Thread Care
Never apply grease or anti-seize to lug nut threads unless the manufacturer specifies it. Lubricated threads lower friction and make a 100 ft-lb reading apply far more clamping force than intended.
Other common errors
The wrong nut type, like a conical nut on a flat seat, prevents proper centering. Skipping re-torque after 50–100 miles risks loose lug nuts and unsafe driving. Over-torquing steel or aluminum rims can permanently damage studs and require costly repairs.
| Mistake | Likely Result | Fix |
|---|---|---|
| Final tightening with impact gun | Stretched studs, warped brake parts | Use calibrated wrench for final amount |
| Greased threads | Excessive clamp force | Keep threads dry unless specified |
| Wrong nut/seat type | Poor centering, vibration | Match nut type to seat and check bolt pattern reference |
| No re-torque | Loose lugs after short time | Re-check nut torque after 50–100 miles |
Finish every job with a calibrated wrench to ensure the correct amount of force is applied to each bolt and stud. Small steps now save time and prevent big repairs later.
Selecting the Right Calibrated Torque Wrench
A precise calibrated torque wrench turns guesswork into reliable, measurable clamping force.
A high-quality calibrated tool is the most important item for any passenger vehicle owner doing their own service. Choose one with ISO 6789 certification to confirm accuracy and repeatability.
The Capri Tools 1/2″ drive flex-head split beam wrench offers a wide 50–250 ft-lbs range and +/-4% accuracy. Its flex-head design helps reach tight lug access on many models and improves the final fit.
Split-beam mechanisms hold settings between uses, which is useful for routine maintenance and reduces calibration drift in daily service work.
| Feature | Why It Matters | Example |
|---|---|---|
| ISO 6789 certification | Verifies factory accuracy and testing | Meets international standards for reliability |
| 50–250 ft-lbs range | Covers most passenger vehicle needs | Good fit for many models and tire jobs |
| Flex-head & split-beam | Easier access and stable settings | Better clearance in tight wells; holds calibration |
Tip: Calibrate tools periodically and store them properly. A well-maintained wrench keeps your fasteners at the correct amount of force and reduces the risk of damage to studs or rims.
Maintenance Tips for Long-Term Wheel Integrity
Small habits—like cleaning threads and storing tools properly—pay off in long-term reliability.
Inspect studs and bolts at each tire change. Look for wear, rust, or straightness issues that could affect clamp force.
If you drive in harsh conditions, check lug nuts more often. A hand check for tightness after short trips saves time and prevents roadside problems.
Clean threads during every rotation to stop corrosion. The membership program recommends this as a routine to improve service life and the owner’s overall experience.
| Item | What to Do | Why |
|---|---|---|
| Studs & bolts | Inspect for stretch or damage | Prevents failure while driving |
| Steel & aluminum rims | Check for cracks or warping | Protects hub and brake parts |
| Torque wrench | Store in case; recalibrate | Keeps accurate readings over time |
Take the time to inspect brake pads and the hub whenever a tire is off. These quick checks help maintain safe driving and extend the life of nuts, lug nut seats, and related parts.
Conclusion
A correct final clamp keeps your lug fasteners holding true during every trip. Proper lug nut torque protects the vehicle, secures the wheels, and lowers the chance of roadside failures.
Follow the torque specifications in your manual and use a calibrated torque wrench or wrench with known accuracy. Verify torque specs and the correct range for your model before final tightening.
Pay attention to lug fit and seat type—steel and alloy rims behave differently. Re-check lug nut torque after short road time to confirm nut torque and proper fit for this passenger vehicle.
We hope this page gave clear steps and confidence. Always review the disclaimer and verify specifications for your exact model before you begin.
FAQ
What is the proper lug nut torque for a 2018 Chevy Cruze?
The factory-recommended lug nut torque for a 2018 Cruze is 100 lb-ft for steel and most alloy wheels. Use a calibrated torque wrench and follow the gradual tightening method to reach this value safely.
Where can I find the official torque specifications for my vehicle?
Check the owner’s manual first; it lists lug nut values and wheel fitment notes. If the manual is unavailable, look for the sticker on the driver-side door jamb or contact a Chevrolet dealer for confirmation.
How should I prepare studs and nuts before installation?
Clean threads and mating surfaces of dirt, corrosion, and old threadlocker. Lightly lubricate only if the manual allows—most manufacturers advise dry threads for lug nuts. Inspect studs and nuts for damage and replace worn parts.
What is the correct tightening procedure to avoid warped rotors or loose wheels?
Start hand-tight, then use a star (criss-cross) pattern to evenly seat the wheel. Torque in stages—for example, 30%, then 60%, then 100% of the target value—allowing the wheel to settle between stages. Re-torque after driving 25–50 miles.
Do steel and alloy wheels require different torque values?
Generally the recommended torque is the same, but some aftermarket alloy wheels or adapters have different specs. Always verify the wheel manufacturer’s recommendation; never exceed the vehicle or wheel limits.
Why should impact guns be avoided when final-torquing lug nuts?
Impact wrenches can over-torque and damage studs, wheel hubs, and brake components. They produce inconsistent force and can cause stretched studs or stripped threads. Use a calibrated torque wrench for final tightening.
How do I choose the right calibrated torque wrench for nuts and studs?
Pick a wrench that covers the lug nut range—commonly 10–150 lb-ft. Choose a click-type or beam model from a reputable brand and have it calibrated annually or after heavy use to ensure accuracy.
When should I re-check lug nut torque after a tire change or service?
Re-torque after the first 25–50 miles of driving following installation. Also check periodically during seasonal tire changes and anytime a wheel has been disturbed, such as brake work or hub servicing.